These grilled (or pan-fried) Halloumi & Pear Bites with Honey-Lemon Dressing and Pomegranate are the perfect quick appetizer. Golden, slightly crispy halloumi pairs beautifully with tender, lightly caramelized pear slices. Easy to assemble, elegant to serve, and bursting with flavor!

This post may contain affiliate links. Read my disclosure policy.
I first discovered halloumi on a family trip to Paris, and I fell in love the very first time I tried it! Ooh la la! I had heard the name before but didn’t realize it was an actual food until I saw it on a menu. Halloumi has a unique, almost meat-like texture that complements so many dishes and flavors. As soon as I returned back home, I started noticing it everywhere! My first package was from Costco, and since then, I’ve experimented with several trial-and-error recipes to really understand how to cook it. I added halloumi to my One-Pot Vegetable Pasta Salad with Ribbon-Style Veggies and made it a halloumi pasta, I added it to my Chickpea Salad With Avocado and Quinoa, and my Easy Cottage Cheese Wraps to make it a halloumi wrap recipe! I quickly learned that the type of halloumi you choose and the temperature at which it’s cooked make all the difference (more on that below).
Recipe Overview
⏱️ Ready in: 15 minutes
🙌 Hands-on time: 5 minutes
🍳 Cook time: 10 minutes
🍽️ Yields: 6 appetizer servings
💪 Diet-Friendly: Vegetarian (can be made vegan), Gluten-Free
Jump to:
- Recipe Overview
- Why You’ll Love This Recipe
- Ingredients
- Why Type of Halloumi You Choose Matters
- Why Temperatures Matters When Making Halloumi
- Substitutions and Variations
- Step-by-Step Instructions
- Top Tips
- Frequently Asked Questions
- Serving suggestions
- Storage and reheating suggestions
- Other delicious appetizers
- Recipe
- Comments
Why You’ll Love This Recipe
- Quick & Easy: Ready in just 15 minutes, perfect for last-minute appetizers. Like my Crunchy Carrot, Cucumber & Radish Salad, this recipe is another 30 Minutes or Less dish that's so easy to make.
- No Grill Necessary: You don’t need an outdoor grill, just a simple grill pan on the stove works beautifully.
- Elegant & Eye-Catching: Bite-sized halloumi and pear stacks with pomegranate look amazing!
- Sweet & Savory: Savory halloumi paired with tender sweet pears and a drizzle of honey. Pears just go so well in savory dishes. I use them in this Fig and Pear Prosciutto Wraps and they alway dissapear fast from the table!
- Vegetarian-Friendly: A flavorful option for vegetarians, with a simple swap to make it vegan.
- It's Versatile: Perfect for parties, holiday gatherings, or a quick weeknight treat.
Ingredients

- Arugula: Adds freshness and contrast to the sweet pears and salty halloumi. It’s completely optional, but using it as a small “bed” makes the appetizer feel restaurant-quality and adds nutrition and beautiful color.
- Halloumi: A firm, brined cheese from Cyprus that’s famous for its high melting point, which is great because the cheese grills instead of melting. When seared, it becomes golden, crispy on the outside, and chewy on the inside.
- Pears: Like for this Pear and Fennel Salad, choose ripe but firm pears so they hold their shape when slightly grilled or pan-seared. Bartlett, Bosc, or Anjou all work well. Their natural sweetness balances the salty halloumi.
- Balsamic Vinegar: Just a splash adds tang, depth, and a touch of acidity to the dressing. It rounds out the honey.
- Honey: Like in my Honey-Glazed Apple and Blueberry Pastry Cups recipe, honey brings everything together with a glossy, sweet finish. Honey lightly caramelizes when drizzled over warm halloumi.
See the recipe card below for the full ingredient list and exact measurements.
Why Type of Halloumi You Choose Matters
Not all halloumi behaves the same! After lots of research and trial and error, here’s what I found makes the biggest difference:
- Traditional Halloumi: Made from a mix of sheep’s and goat’s milk. It's firmer, browns well, and holds its shape perfectly. This one is the best choice, but is not always easily available.
- Cow's Milk Halloumi: It's usually available at Costco, grocery stores, and markets. It is slightly softer, milder in flavor, and can melt faster if the heat is too low.
- Pre-Sliced: Convenient, but often thinner than ideal for this recipe. You'll have to watch these closely when they are grilled/fried as they can burn faster and will need less time to cook.
- Flavored: There are some delicious options available, but they may also brown differently and have varying moisture levels. Not really ideal for this recipe.
Why Temperatures Matters When Making Halloumi
Halloumi can go from perfectly golden to burnt and rubbery fast! To hit that “golden middle,” make sure your grill or pan is preheated to a steady sizzle, not smoke. Halloumi should brown in about 1-2 minutes per side. A quick test: drop in a small piece and see if it sizzles right away. If it does, your pan is ready.
I learned the hard way that if the heat is too low, halloumi releases moisture, softens, and starts to melt before it ever browns. But if the heat is too high, the outside burns before the inside softens. Finding that medium to medium-high sweet spot is the secret to beautifully golden, delicious halloumi every time.
Substitutions and Variations
- Arugula: Baby spinach, spring mix (like in this Spring Vegetable and Berry Salad, or even some microgreens (beautiful for entertaining!).
- Pear: Similar to my sweet and savory Tuna Steak with Sundried Tomatoes and Figs, you can swap pears for fresh figs. You can also use thin slices of Honeycrisp, Pink Lady, or Ambrosia apples.
- Honey-Only Version: Skip the balsamic for a sweeter, simpler flavor profile. Or use some fresh lemon juice instead.
- Halloumi: If halloumi isn’t available, you can easily substitute it with firm, grill-friendly cheeses like paneer, queso blanco, or queso panela. Just choose a cheese that stays firm and doesn’t melt when heated.
Step-by-Step Instructions
STEP 1: Pan-grill the halloumi

Heat a dry non-stick grill-pan (or pan) over medium-high heat. Add the halloumi slices and cook for about 1 minute per side, or until golden. Remove and set aside.
STEP 2: Sear the pear

Using the same pan, add the pear slices and cook 30–60 seconds per side. Place each pear slice over each halloumi piece. Allow the halloumi and pear to cool down.
STEP 3: Prepare the dressing

In a small bowl, whisk together olive oil, honey, and balsamic vinegar.
STEP 4: Assemble
Place arugula on a platter (optional) and top with halloumi and pears. Drizzle the dressing and sprinkle pomegranate arils over the top.
Top Tips
- Cut the halloumi into uniform pieces so they brown at the same rate and look neat when stacked.
- Halloumi needs a hot pan to properly caramelize. If the heat is too low, it will soften and melt before browning. If the heat is too high, it will scorch on the outside while staying rubbery inside.
- I like to cook halloumi on a grill pan on the stovetop. It gives those beautiful grill lines and browns the cheese evenly without needing an outdoor grill.
- Different brands of halloumi vary in saltiness and moisture, so you may need to adjust the heat or cooking time slightly.
- If your halloumi is packed in brine, lightly pat it dry before cooking to help it sear and not steam.
Frequently Asked Questions
Halloumi is a firm, brined cheese traditionally made from a mix of sheep’s and goat’s milk, although many store-bought versions also include cow’s milk.
Yes! Halloumi pairs really well with honey. The salty, savory flavor of the cheese contrasts perfectly with the sweetness of honey. It's actually a very popular combination in appetizers, salads, and Mediterranean dishes.
You can do either. Both methods work well. Grilling gives halloumi a smoky, charred flavor, and pan-frying gives it a quick, golden sear with a crisp exterior.
Serving suggestions
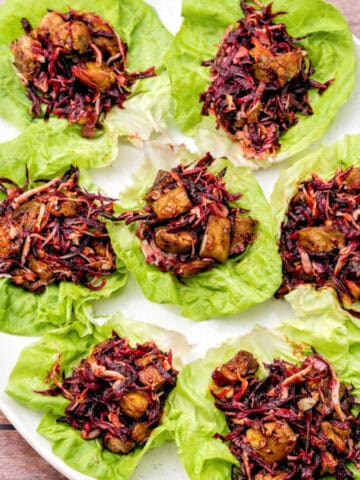
The grilled/pan fried halloumi are great as an appetizer! Serve it alongside other appetizers, such as my 5-Ingredient Tuna Salad Deviled Eggs, or my Cinnamon Pineapple and Beef Appetizer. They're also great served with flavorful salads, like this Simple 5-Ingredient Beet Sauerkraut Salad or this Crunchy Carrot, Cucumber & Radish Salad with Kohlrabi.
Storage and reheating suggestions
Store cooked halloumi and pears separately and keep the dressing in a sealed jar in the fridge for up to 1 week. Assemble only when you're ready to serve.
Reheat halloumi in a dry pan for 1–2 minutes per side. Do not microwave, since halloumi becomes rubbery.
Other delicious appetizers
If you tried this Grilled Halloumi with Pear and Honey recipe or any other recipe on my website, please leave a 🌟 star rating and let me know how it went in the 📝 comments below. And feel free to tag me on Instagram @cre8athome so I can see your creations! Thanks for visiting!
Recipe

Grilled Halloumi with Pear and Honey (Easy Appetizer)
Equipment
- Indoor Grill or a grill pan/regular pan
Ingredients
- 1 block halloumi cheese
- 1-2 pears ripe but firm
- 1 tablespoon olive oil
- 1 tablespoon honey
- 1 teaspoon balsamic vinegar optional
- 1 cup arugula optional, for serving
- ¼ pomegranate arils for garnish
Instructions
- Cut the halloumi into rectangles and slice the pears into similar-sized pieces so they stack neatly.1 block halloumi cheese, 1-2 pears
- Heat a dry indoor grill, grill pan, or non-stick pan over medium to medium-high heat. Add the halloumi slices and cook for about 1 minute per side, or until golden. Remove and set aside.
- Using the same pan, add the pear slices and cook 30–60 seconds per side. This softens them slightly and enhances their natural sweetness. Place each pear slice over each halloumi piece. Allow the halloumi and pear to cool down slightly.
- In a small bowl, whisk together olive oil, honey, and balsamic vinegar. Set aside.1 tablespoon olive oil, 1 tablespoon honey, 1 teaspoon balsamic vinegar
- Place the arugula on your platter (optional). Top with halloumi and pears. Secure each stack with a toothpick if serving as individual bites (optional).1 cup arugula
- Drizzle the honey dressing over the assembled halloumi and pear bites. Sprinkle pomegranate arils over the top.¼ pomegranate arils
Notes
- Cut the halloumi into uniform pieces so they brown at the same rate and look neat when stacked.
- Halloumi needs a hot pan to caramelize properly. If the heat is too low, it will soften and melt before browning. If the heat is too high, it will scorch on the outside and stay rubbery on the inside.
- I like to cook halloumi on a grill pan on the stovetop. It gives those beautiful grill lines and browns the cheese evenly without needing an outdoor grill.
- Different brands of halloumi vary in saltiness and moisture, so you may need to adjust the heat or cooking time slightly.
- If your halloumi is packed in brine, lightly pat it dry before cooking to help it sear and not steam.
- Reheat halloumi in a dry pan for 1–2 minutes per side. Do not microwave, since halloumi becomes rubbery.


val
I made these last night! tasted amazing!