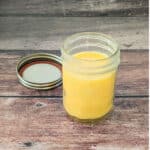
How to Make Ghee at Home
Making ghee at home is way easier than you might think (and than I thought!). And the flavor is so much better than the store-bought kind. It starts with butter and slowly turns into a rich, golden oil that smells amazing and adds great flavor to just about anything you cook. In this post, I’ll walk you through how to make it step-by-step, plus share a few fun ways to flavor it.
Servings: 16 tablespoons
Calories: 204kcal
Equipment
- Fine Mesh Strainer or cheesecloth
Ingredients
- 1 lb (454 g) unsalted butter preferrably grass-fed

Instructions
- Cut the butter into chunks and place them in a heavy-bottomed saucepan over medium-low heat. Let it melt slowly, uncovered, stirring occasionally and breaking all the melting pieces1 lb (454 g) unsalted butter
- Once melted, reduce the heat to low. The butter will separate into three layers: foam on top, golden liquid in the middle, and milk solids at the bottom.
- Continue simmering gently (without stirring) until the milk solids at the bottom turn golden brown and the liquid becomes clear and fragrant (about 20–25 minutes).
- Remove from heat. Carefully pour the liquid ghee through a fine mesh strainer or cheesecloth into a clean, dry glass jar, leaving the browned milk solids behind.
- Let the ghee cool completely before sealing the jar. Store it at room temperature for up to 3–6 months, or refrigerate for up to a year.
Notes
- Grass-fed or organic butter gives richer flavor and a deeper golden color.
- Use a light colored pan. This helps you see when the milk solids start browning, so you don’t overcook.
- Add herbs, spices, or garlic either during the last few minutes of simmering or after straining to infuse flavor. Just be careful not to overcook them, or the taste can turn bitter.
- Some people like to remove the foam on top during simmering for a clearer final result.
- Straining twice gives you a more silky texture with no residual solids.
- You can save the brown milk solids left in the strainer. They make a delicious spread on toast or mixed into rice for extra flavor.
- Always use a clean, dry spoon to scoop ghee.
- Label jars! Include the date made and flavor, if you're making multiple flavored variations.
Nutrition
Calories: 204kcal | Carbohydrates: 0.02g | Protein: 0.2g | Fat: 23g | Saturated Fat: 15g | Polyunsaturated Fat: 1g | Monounsaturated Fat: 6g | Trans Fat: 1g | Cholesterol: 61mg | Sodium: 3mg | Potassium: 7mg | Sugar: 0.02g | Vitamin A: 711IU | Calcium: 7mg | Iron: 0.01mg